Discussion
In this section, you can create discussion questions for each session, which students will answer and may receive grades for.
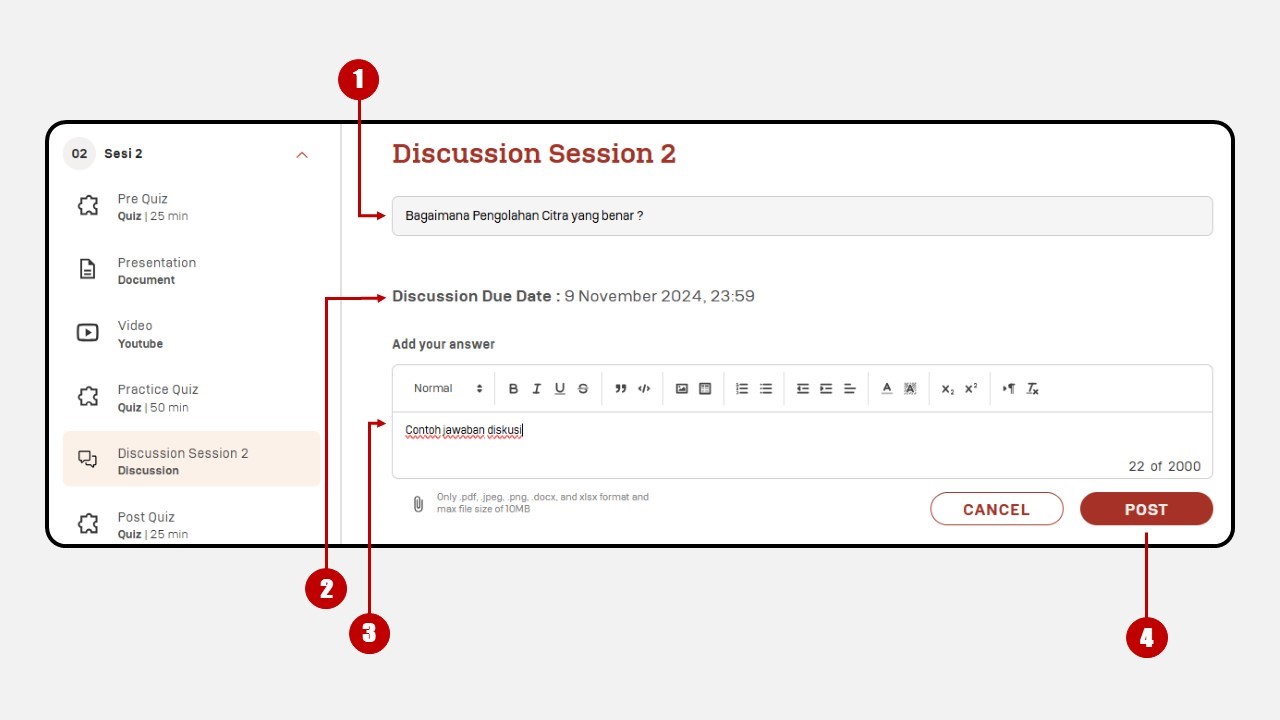
- Contains discussion questions.
- Includes a Due Date for students to submit their answers.
- You can provide a summary or conclusion of the discussion question in the “Add your answer” field.
- Once you’ve entered your response, click the “Post” button to submit it.
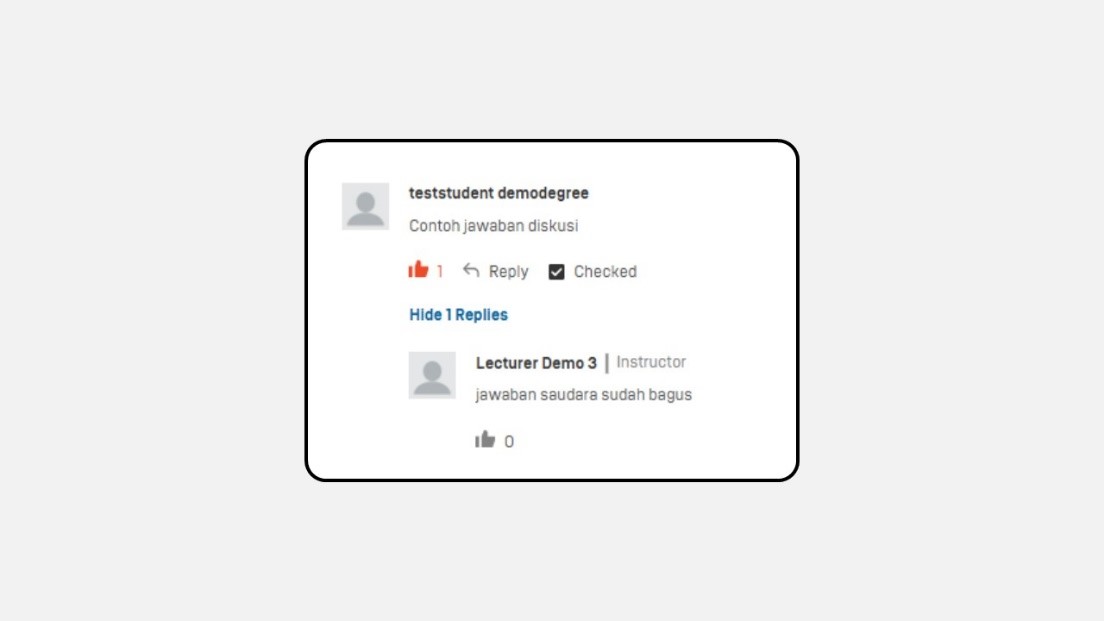
Example of a Student’s Submitted Answer.
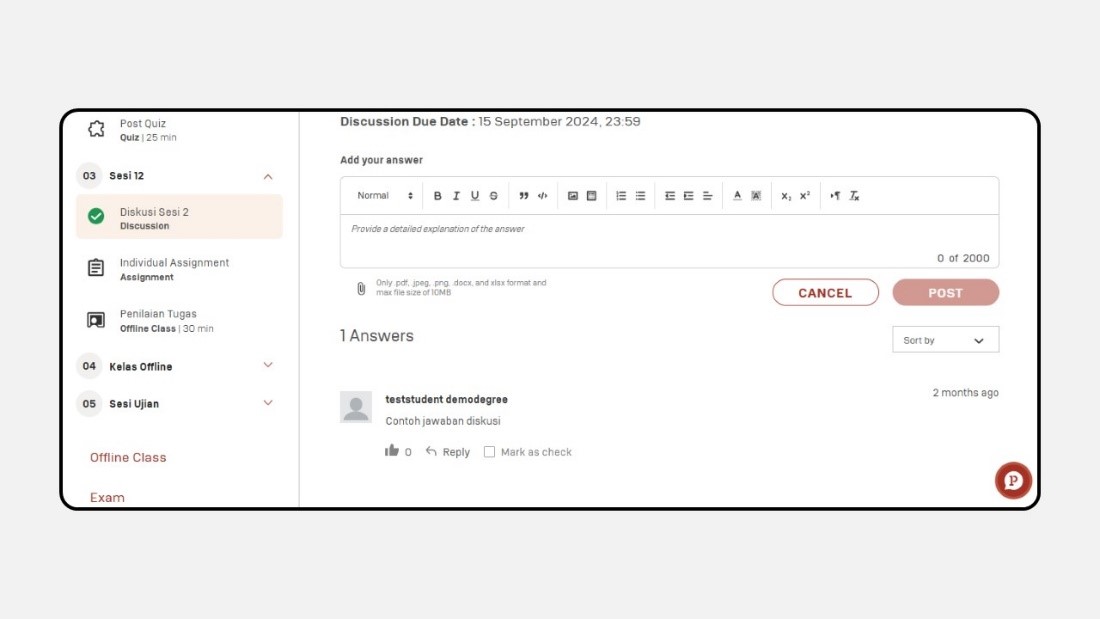
As an instructor, you can also grade student answers based on the criteria shown in the image below.
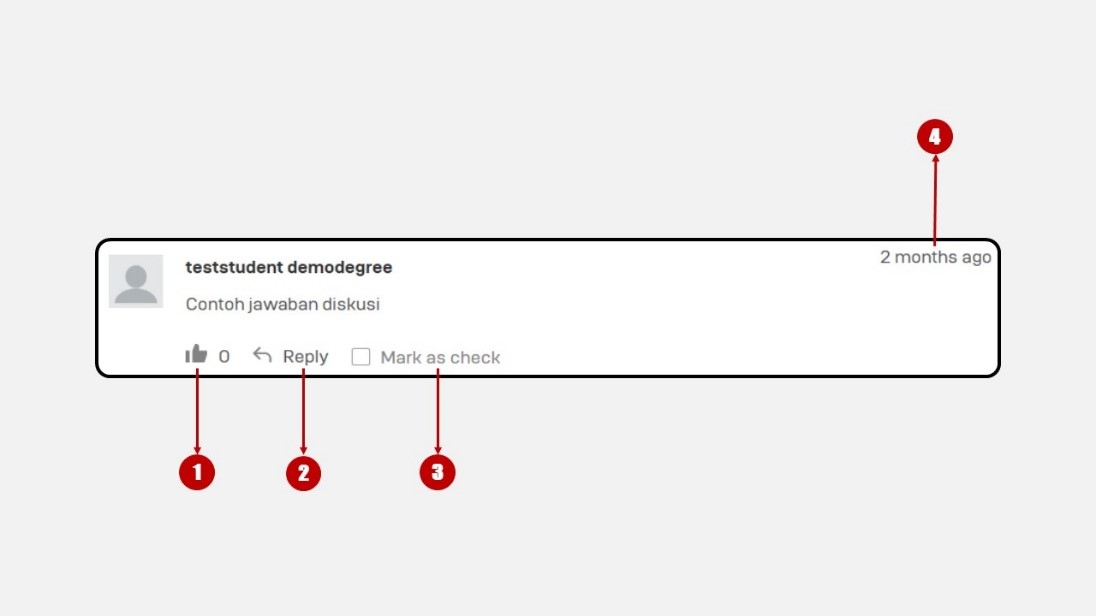
- Thumb Up/Like Icon: This serves only as appreciation for the student's answer and does not contribute to their grade. If you only give a Thumb Up, the student will not receive any points.
- Reply: Use this feature to leave comments on the student's answer.
- Mark as Check: This assigns 1 point to the student’s answer. If you click Mark as Check, the student will earn 1 point for the discussion.
- Displays the timestamp of when the student submitted their answer.
Example of Graded and Commented Answers.
Steps to Upload a Discussion Question :
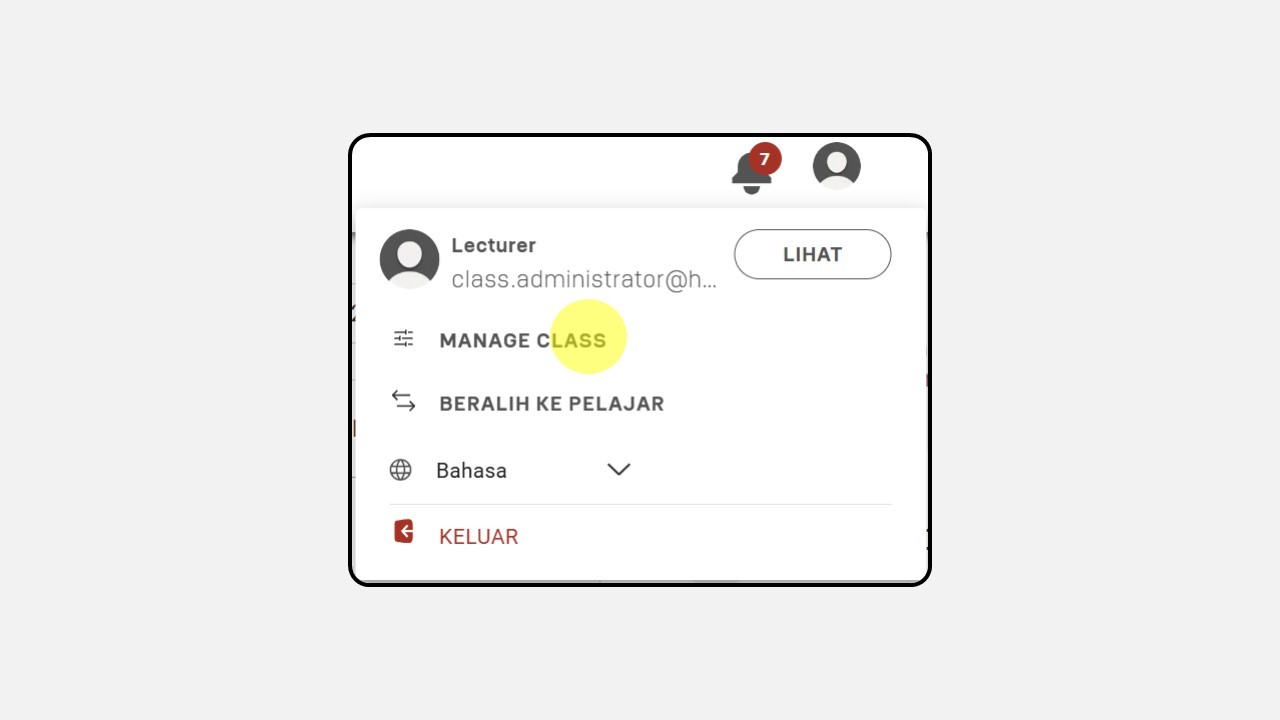
- Click the Profile icon in the top-right corner of the Dashboard.

- Select Manage Class.
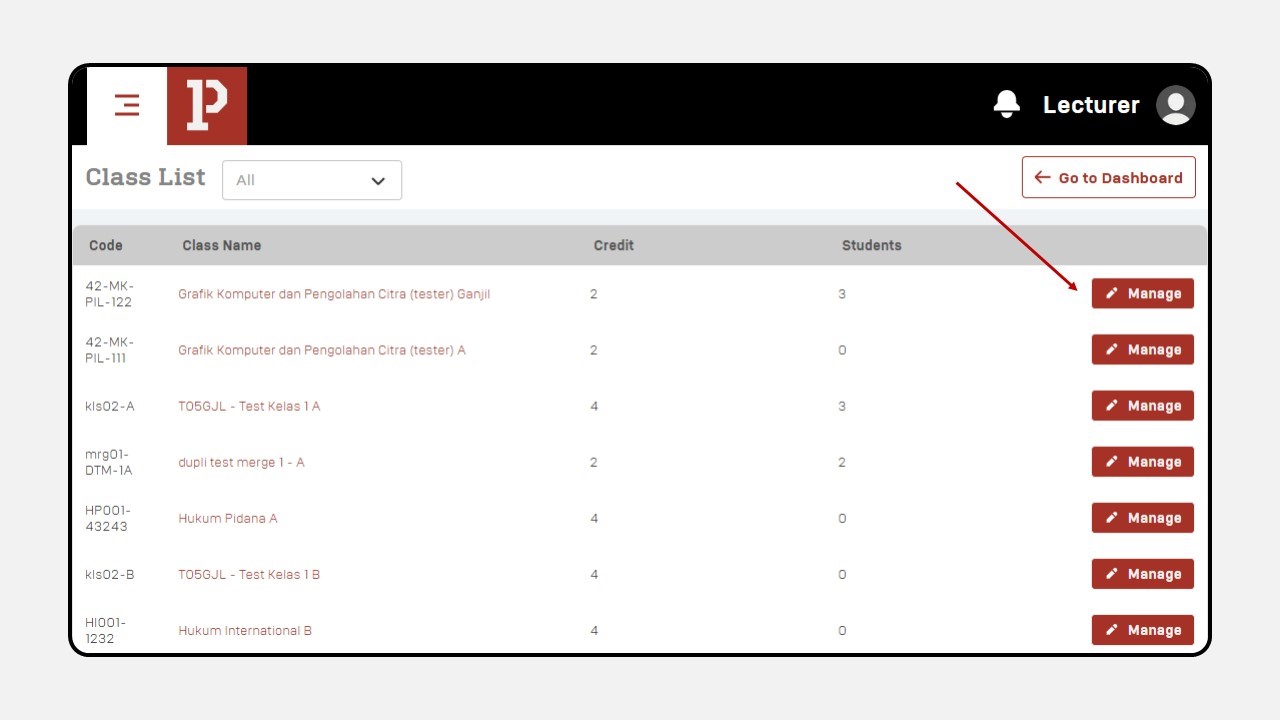
- Choose the class you want to edit, then click Manage.
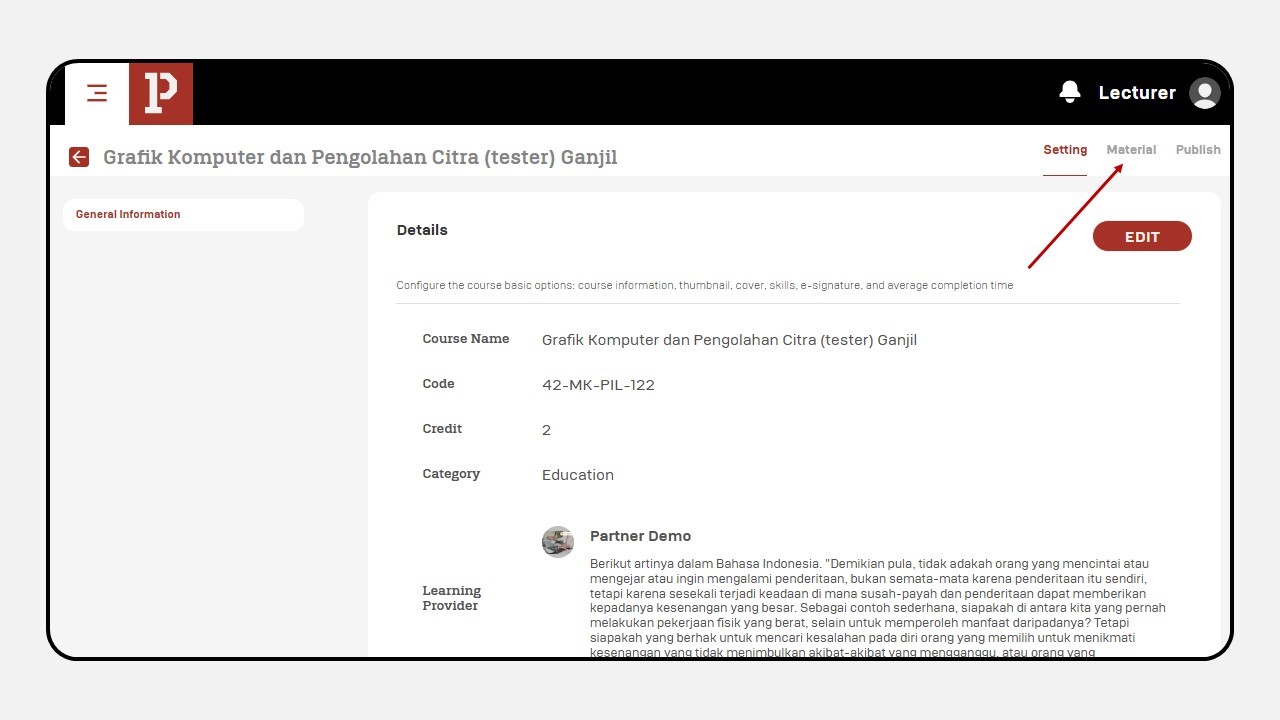
- After selecting the class, a new screen will appear. Click Material.
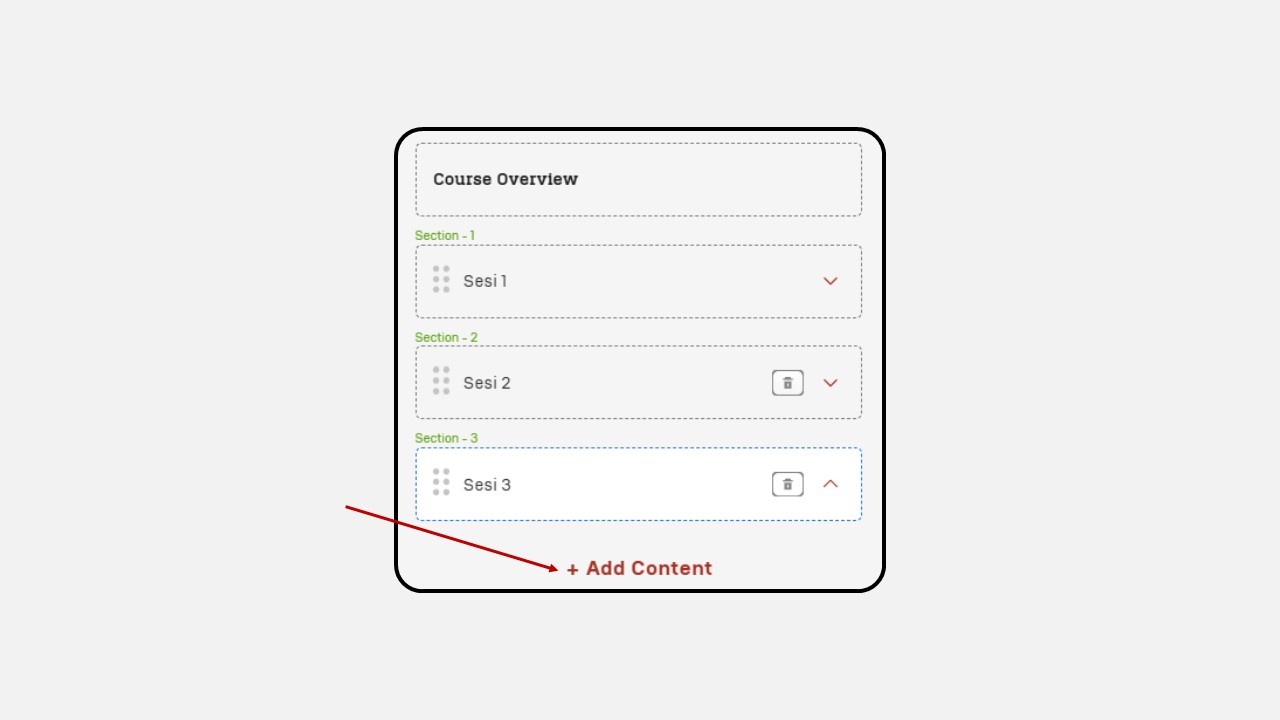
- Select the session where you want to add a discussion, then click + Add Content.
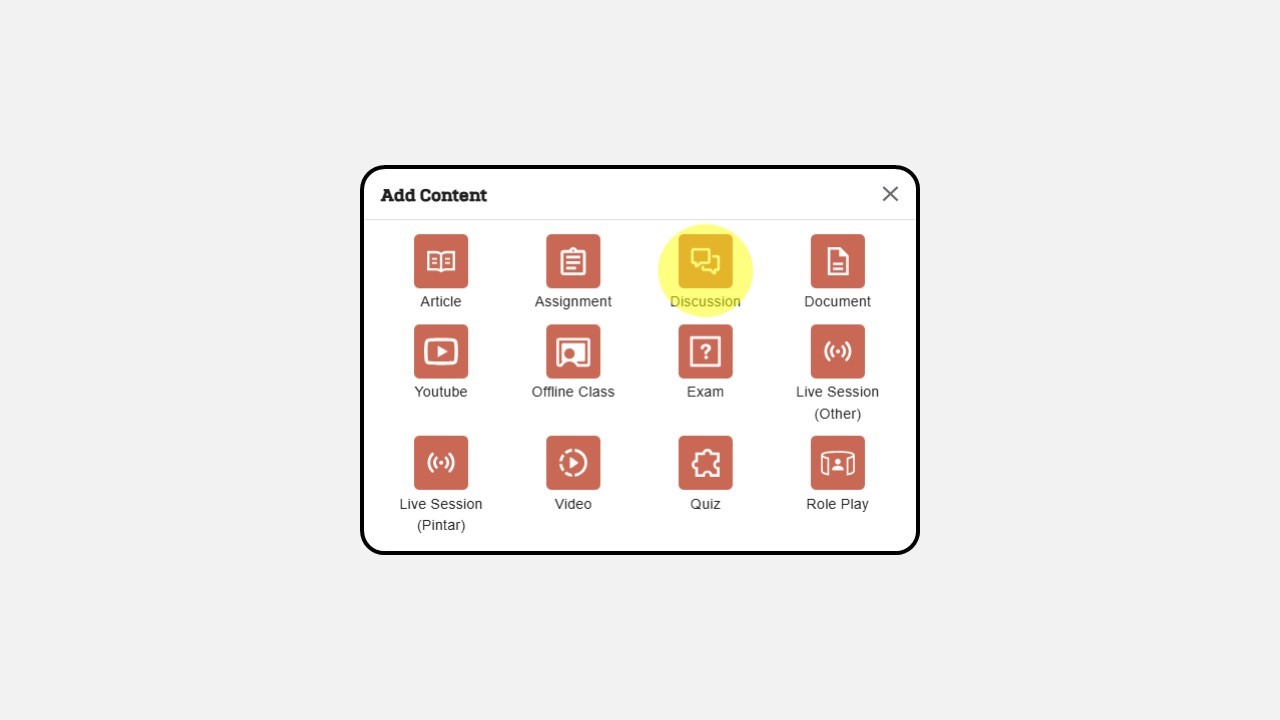
- Choose the Discussion content type.
7. Enter the discussion title and question in the fields provided.
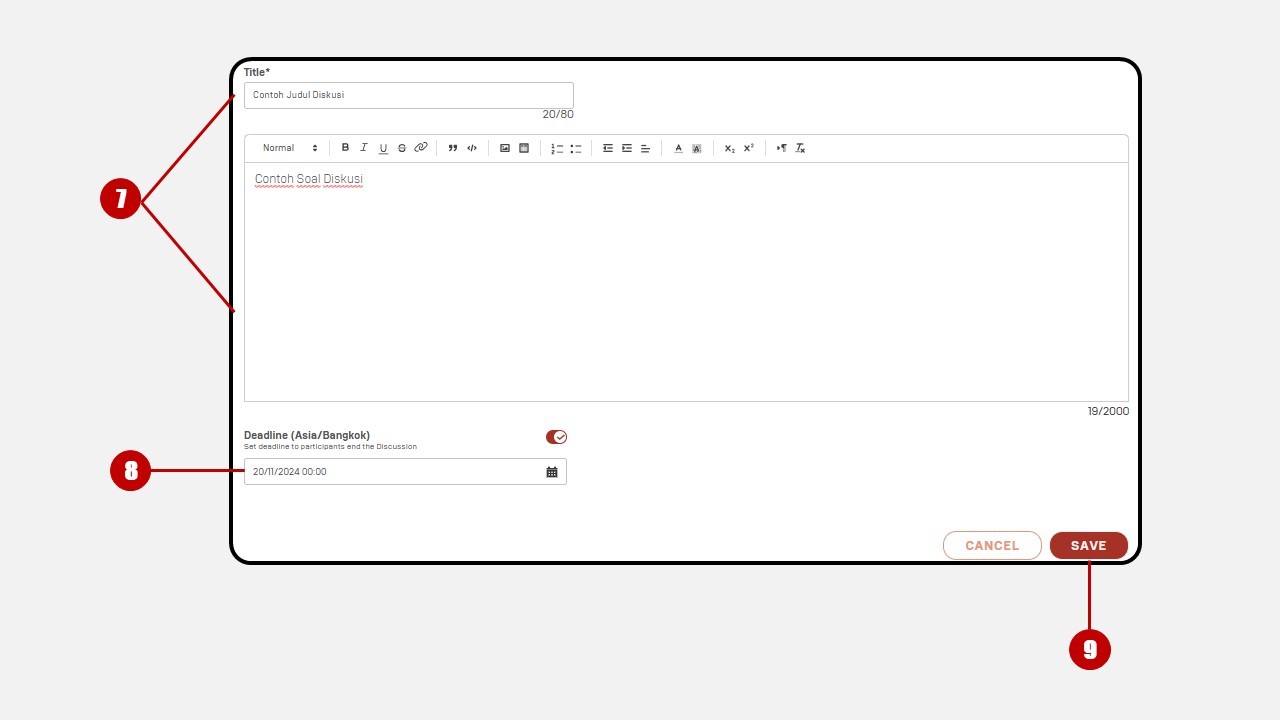
Set the deadline.
Once completed, click Save in the bottom-right corner.
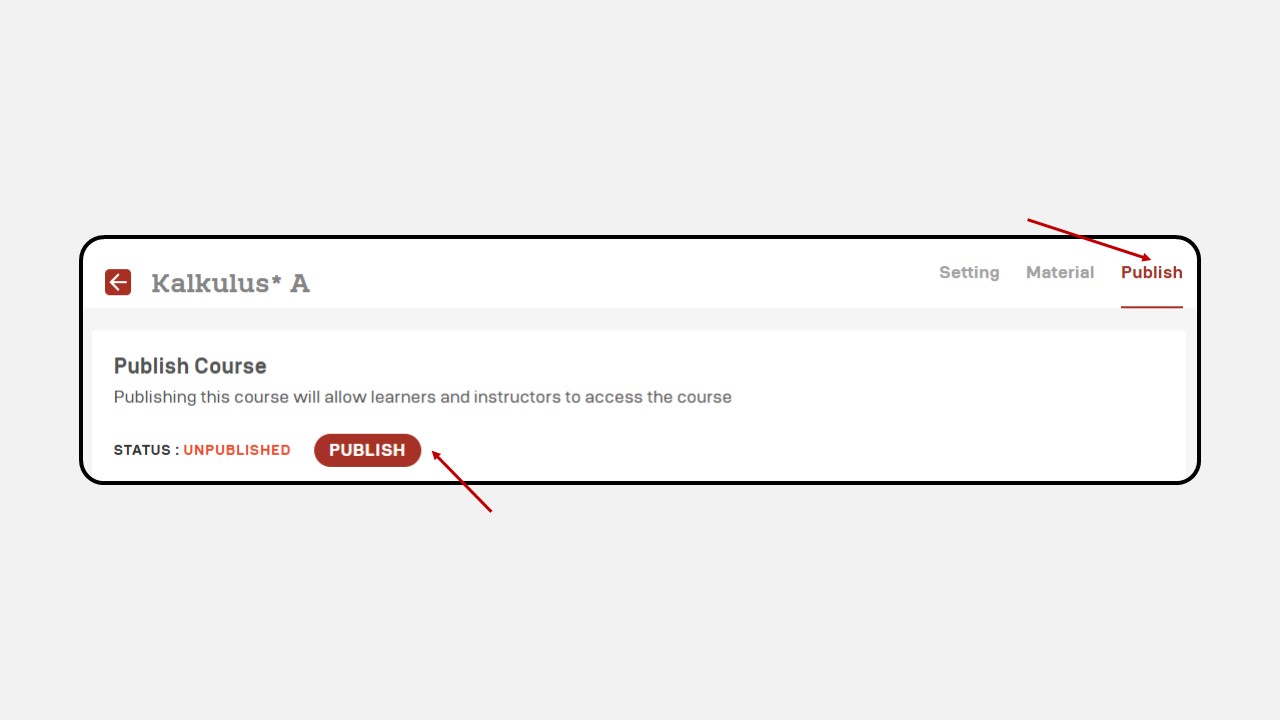
Select the Publish menu in the top-right corner, then click the Publish button.
