Live Session (Other)
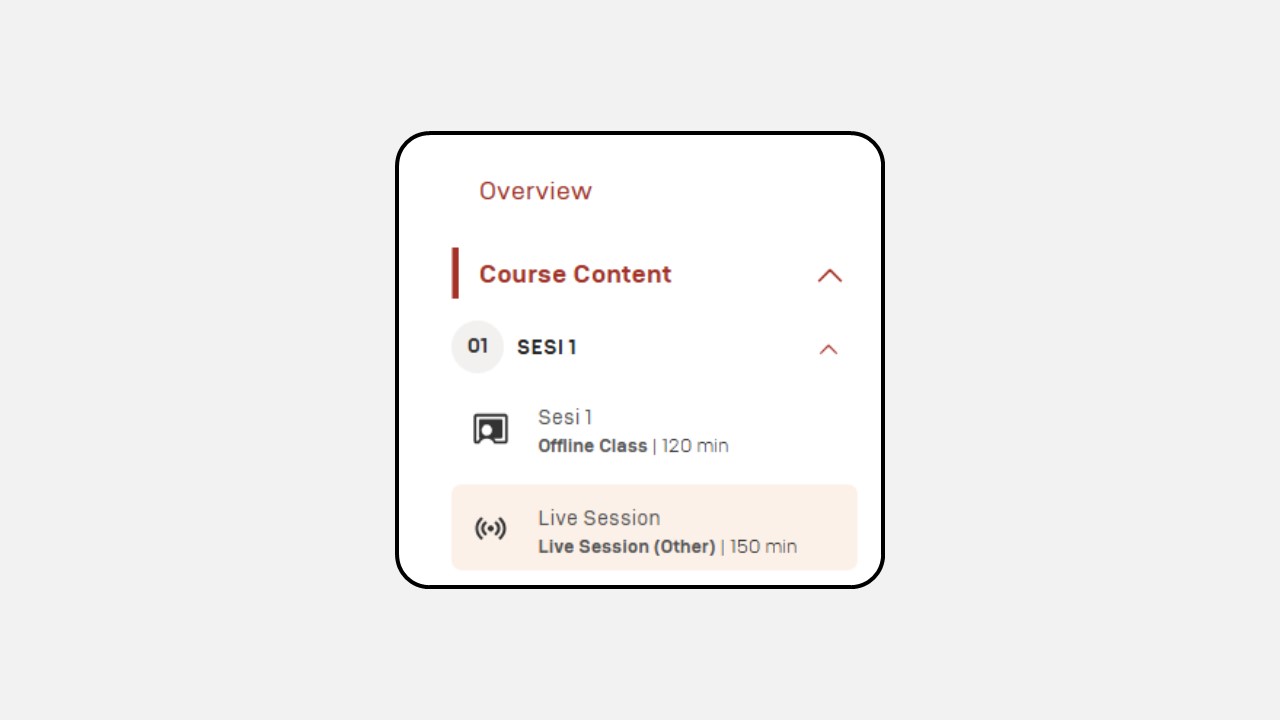
In the Live Session, you as the instructor and all students will participate in a real-time session using platforms such as Zoom or Google Meet.
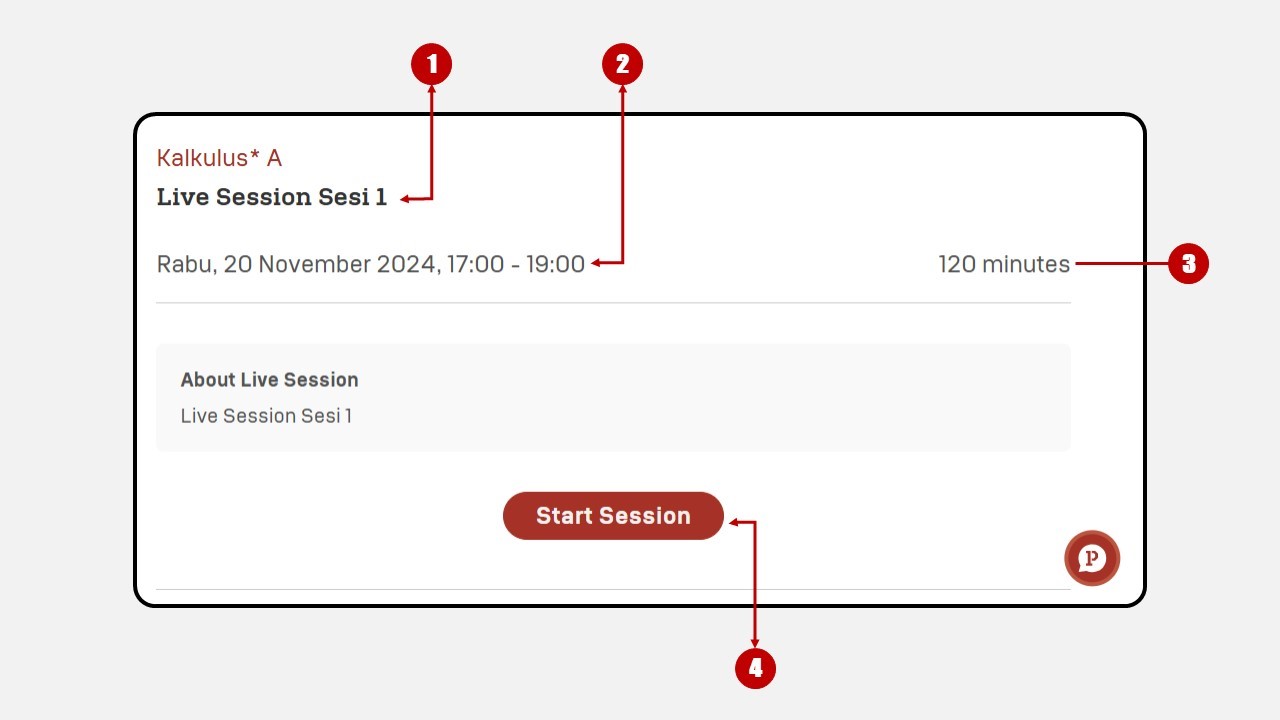
The Live Session interface includes the following information:
- Live Session Title
- Scheduled Date and Time of the Live Session
- Duration of the Live Session
- Start Session Button: You can click this button to enter the Live Session room. Access to the session is available at the scheduled time.
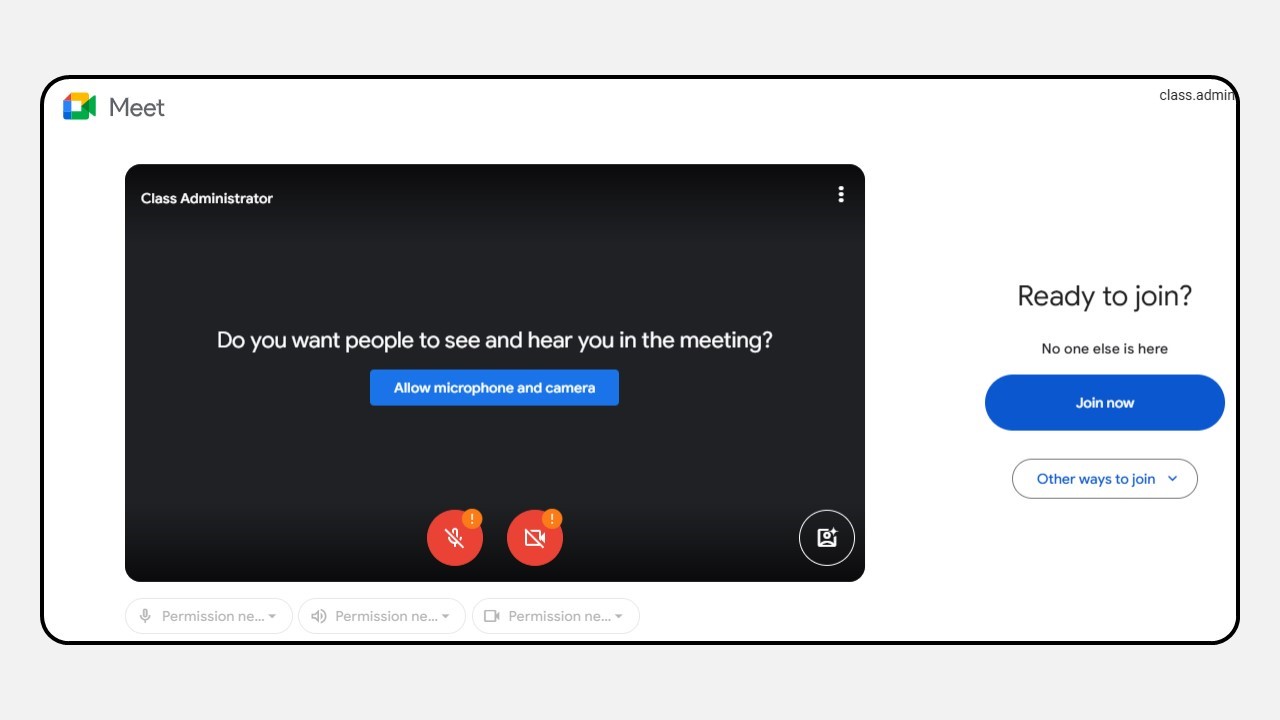
When you join the session using the Start Session button, the Zoom or Google Meet interface will appear as shown in the example image.
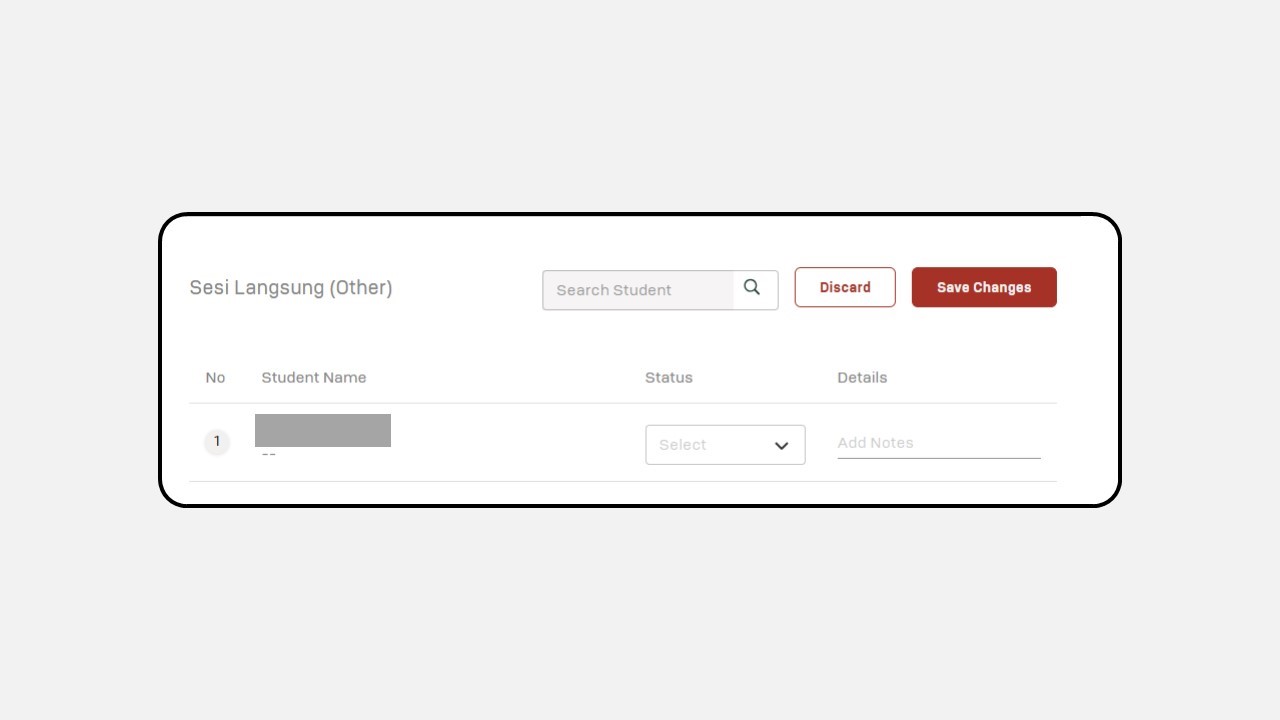
Additionally, you can record student attendance based on their participation in the Live Session.
Steps to Add a Live Session (Other) :
- Click the Profile icon in the top-right corner of the Dashboard.
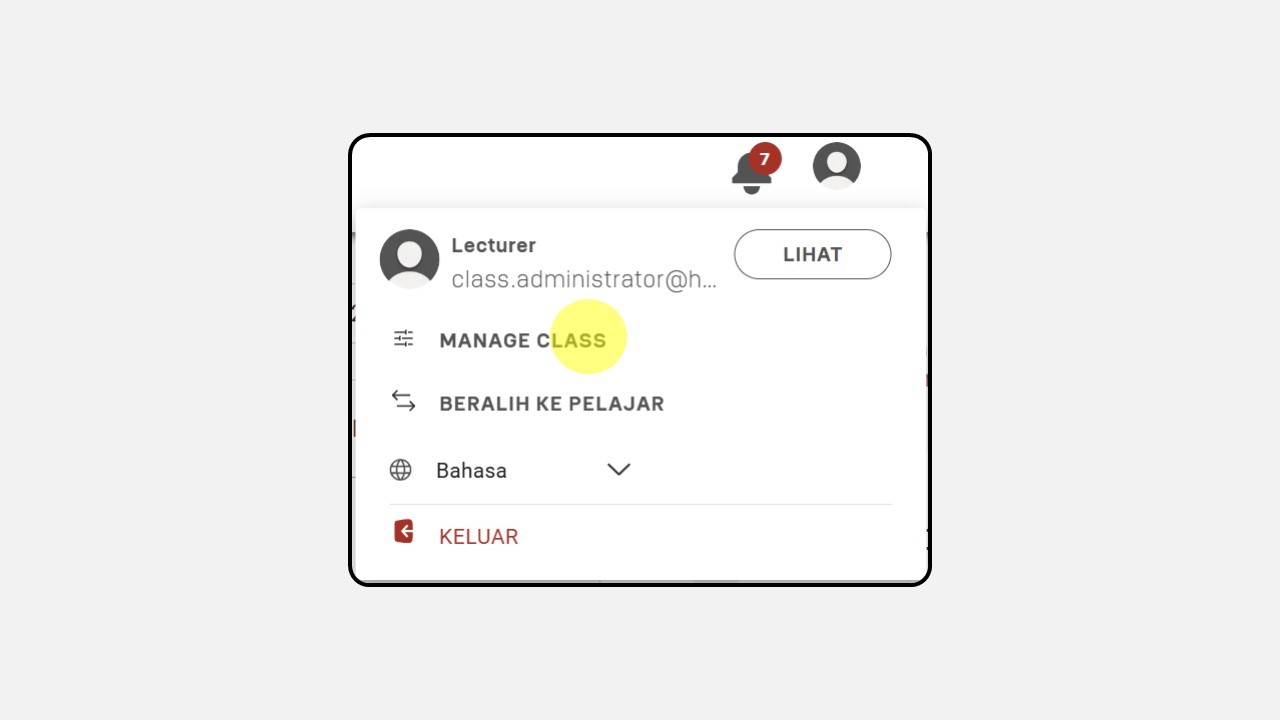
- Select Manage Class.
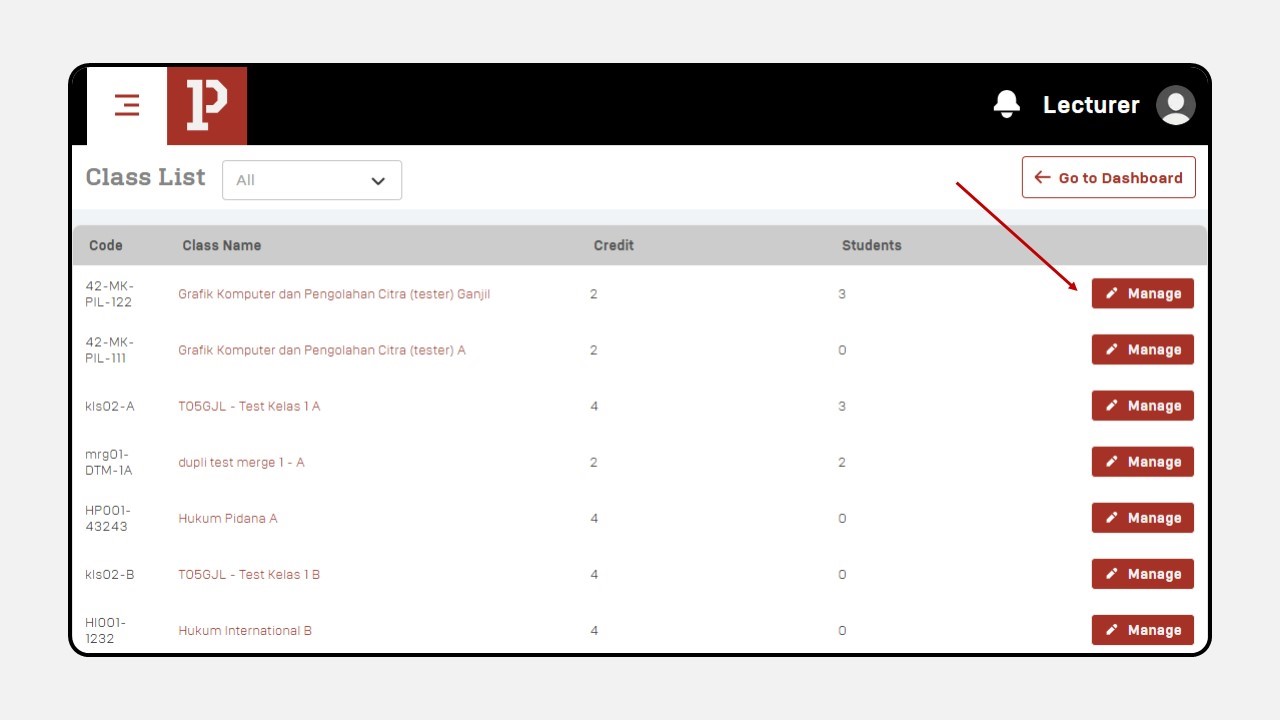
- Choose the class you want to edit, then click Manage.
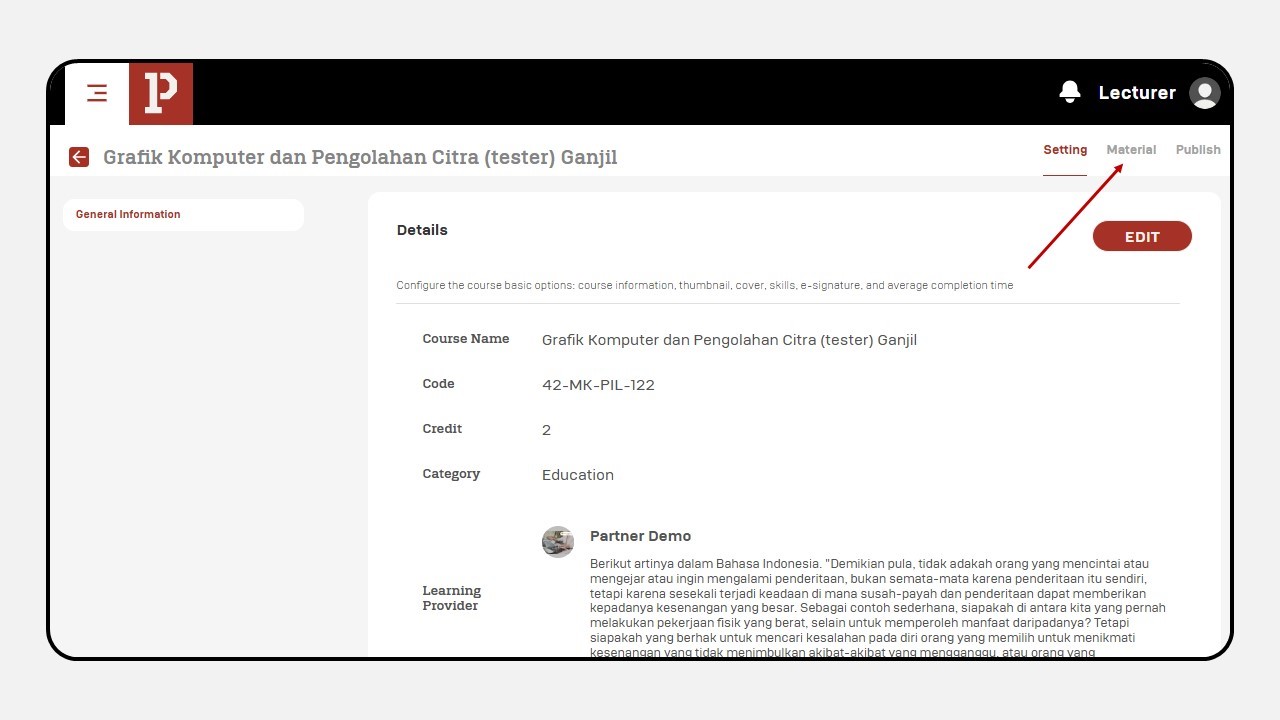
- After selecting the class, a new screen will appear. Click Material.
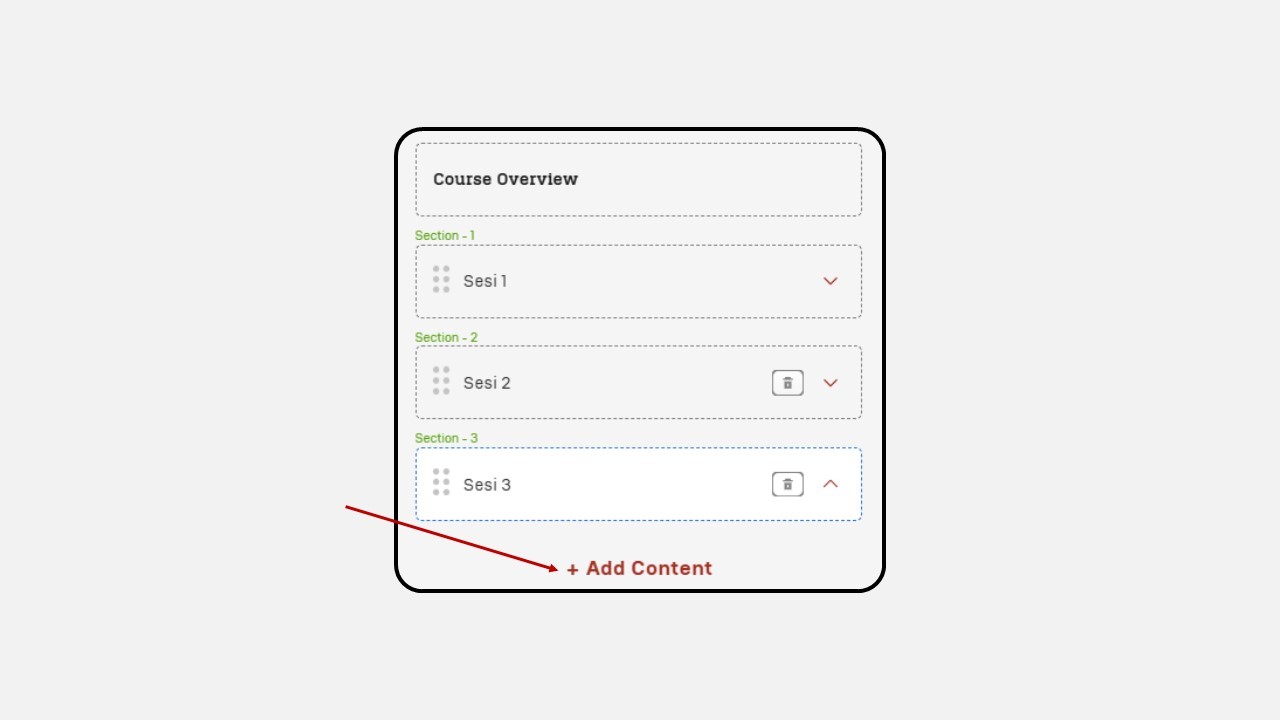
- Select the session where you want to add a Live Session (Other), then click + Add Content.
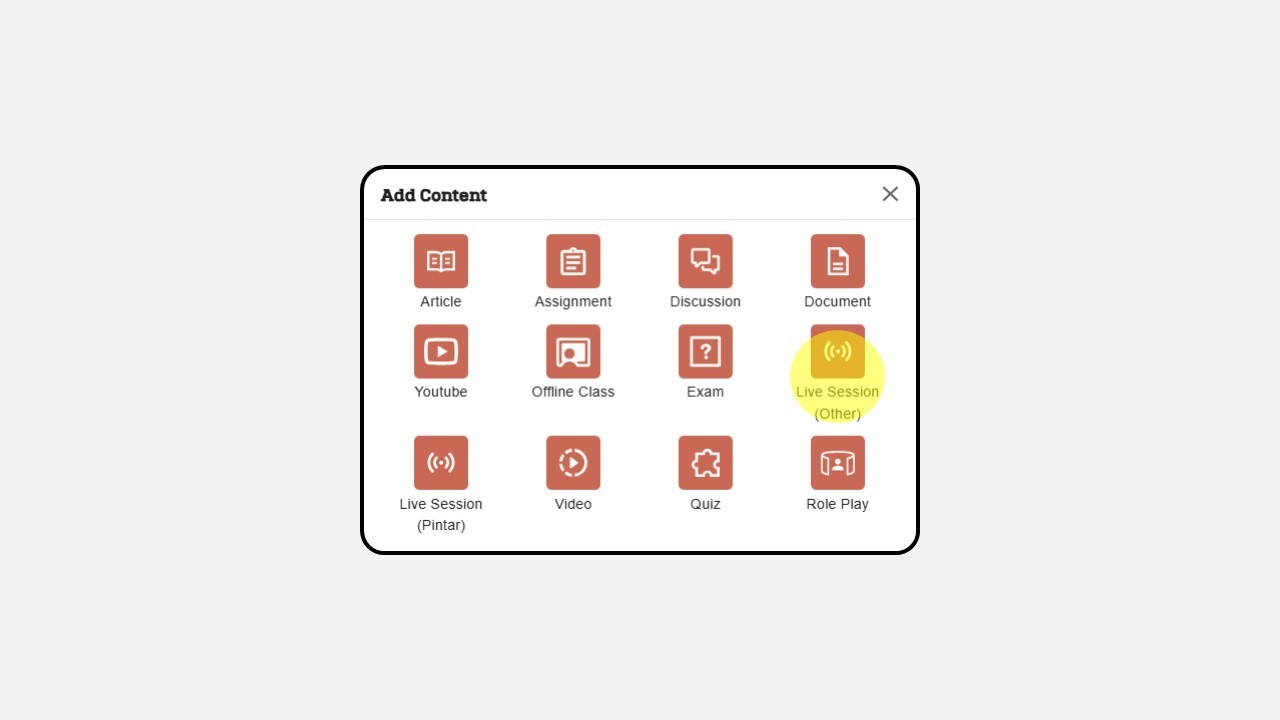
- Choose the Live Session (Other) content type.
7. Fill in all the required information about the Live Session (Title, Description, URL Link, Start Date, Duration).
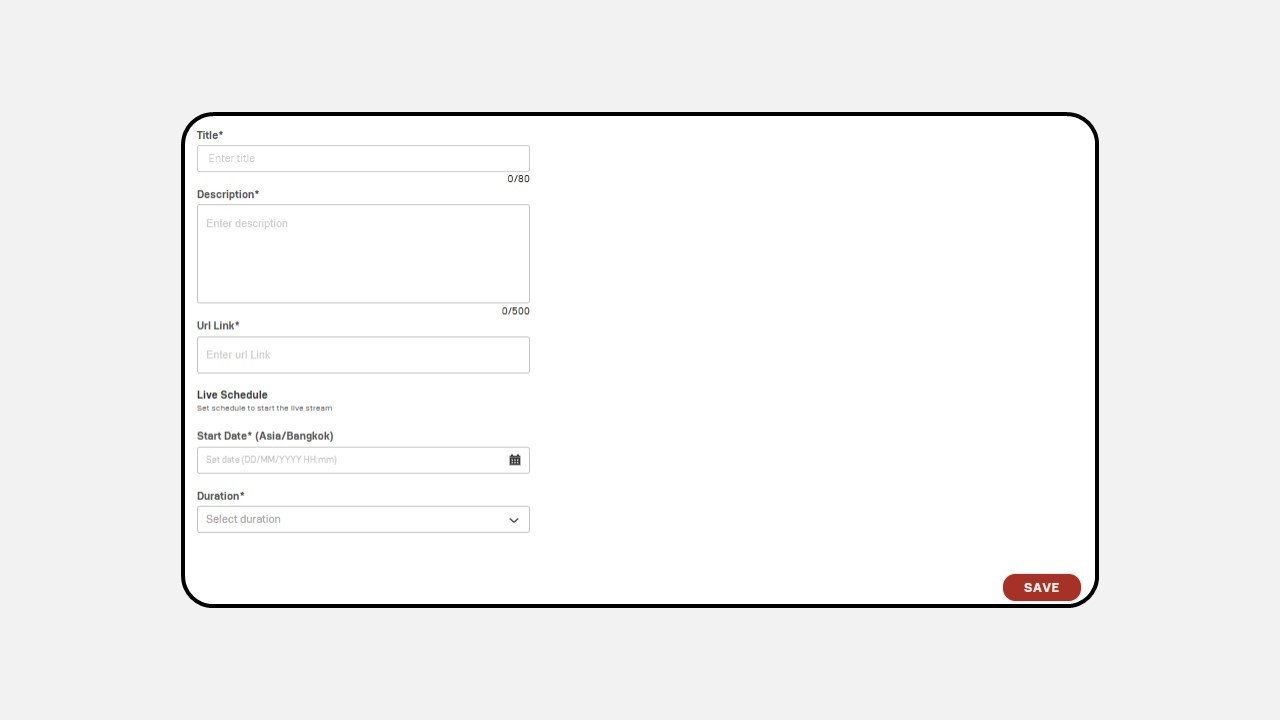
Once all the information is completed, click Save in the bottom-right corner.
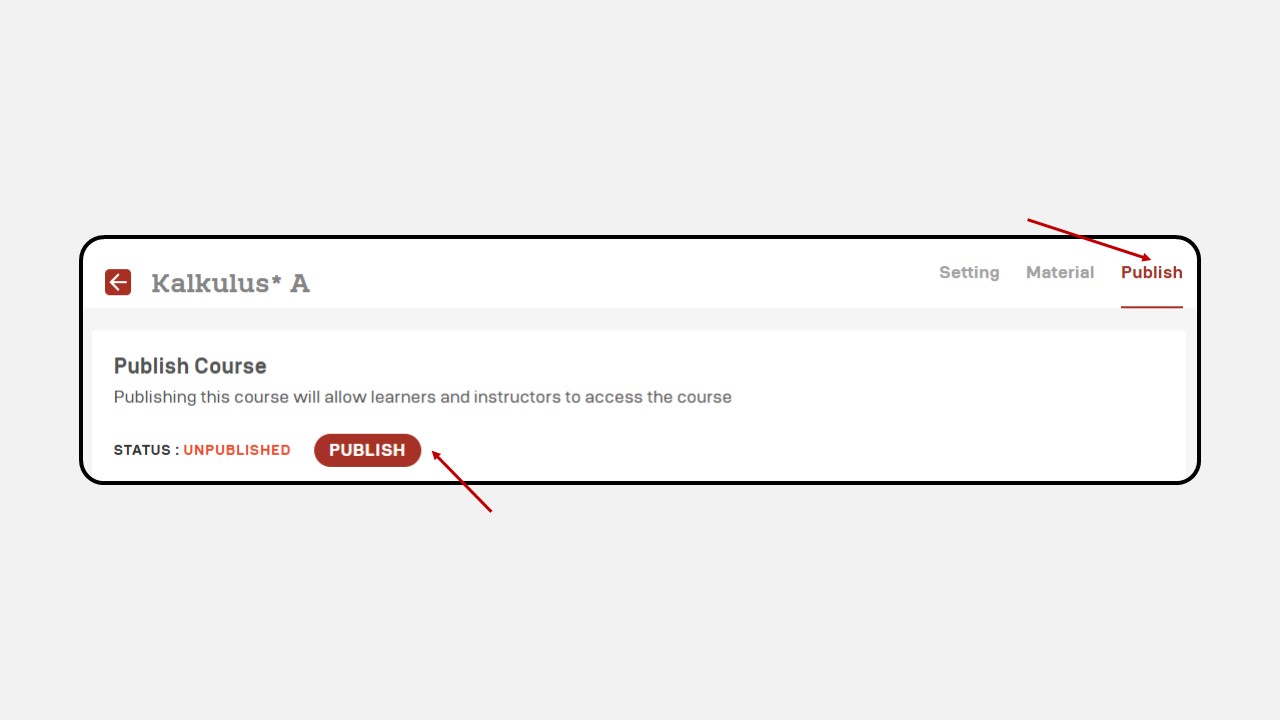
Select the Publish menu in the top-right corner, then click the Publish button.
