Product Skills
You can click on the Product menu.
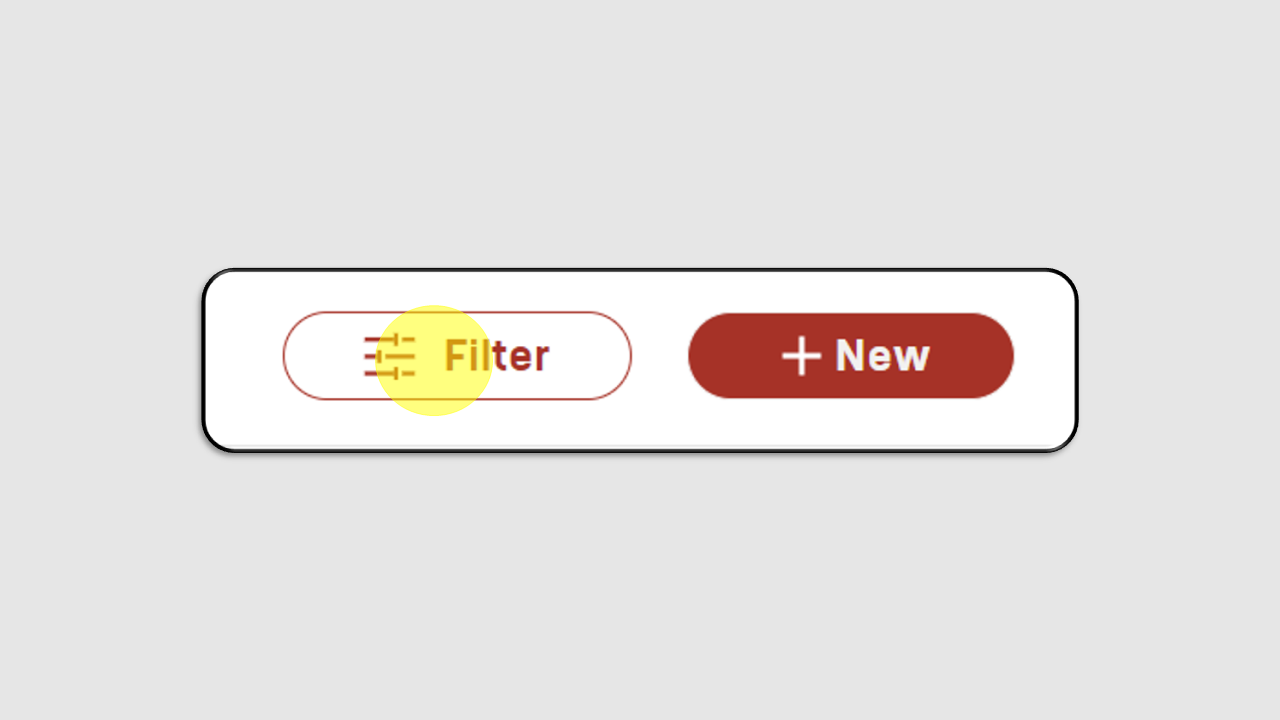
To make it easier to find Product Skills, you can click the Filter Icon located in the upper right corner.
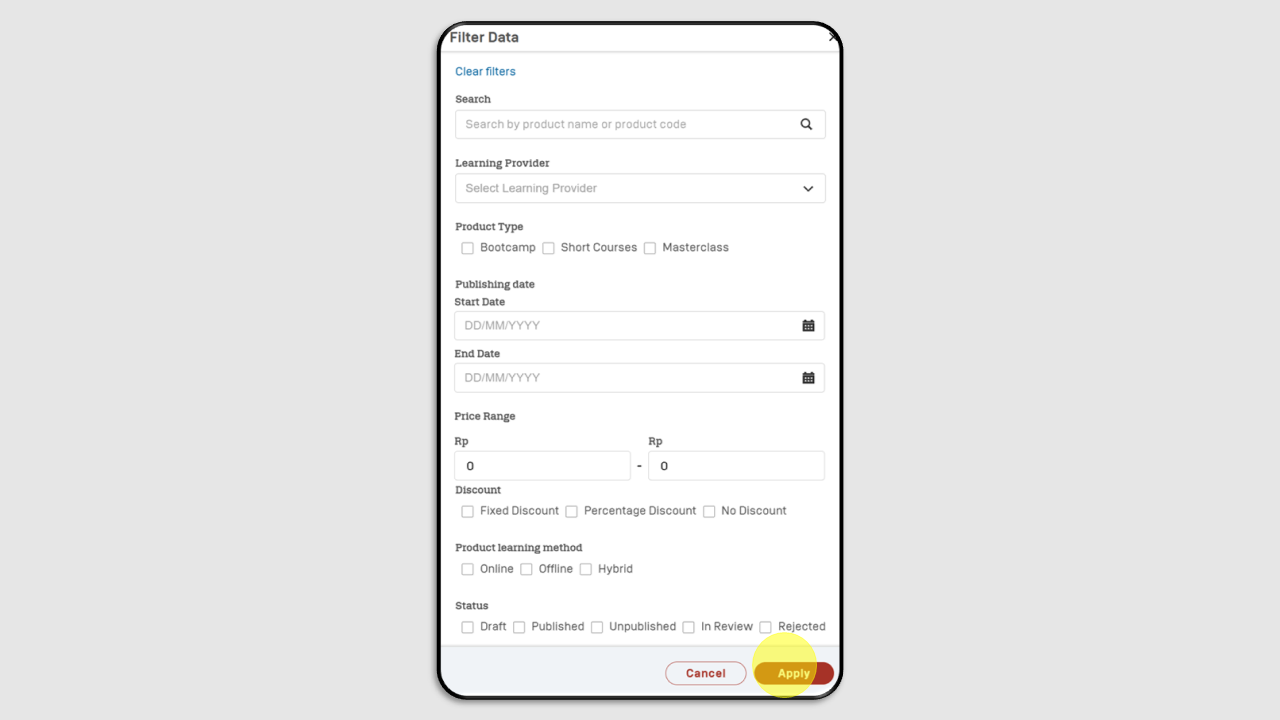
Fill in the search field according to the product you are looking for, then click Apply.
To create a new product, click +New.
1. How to Fill in the General Information Section
Program Information
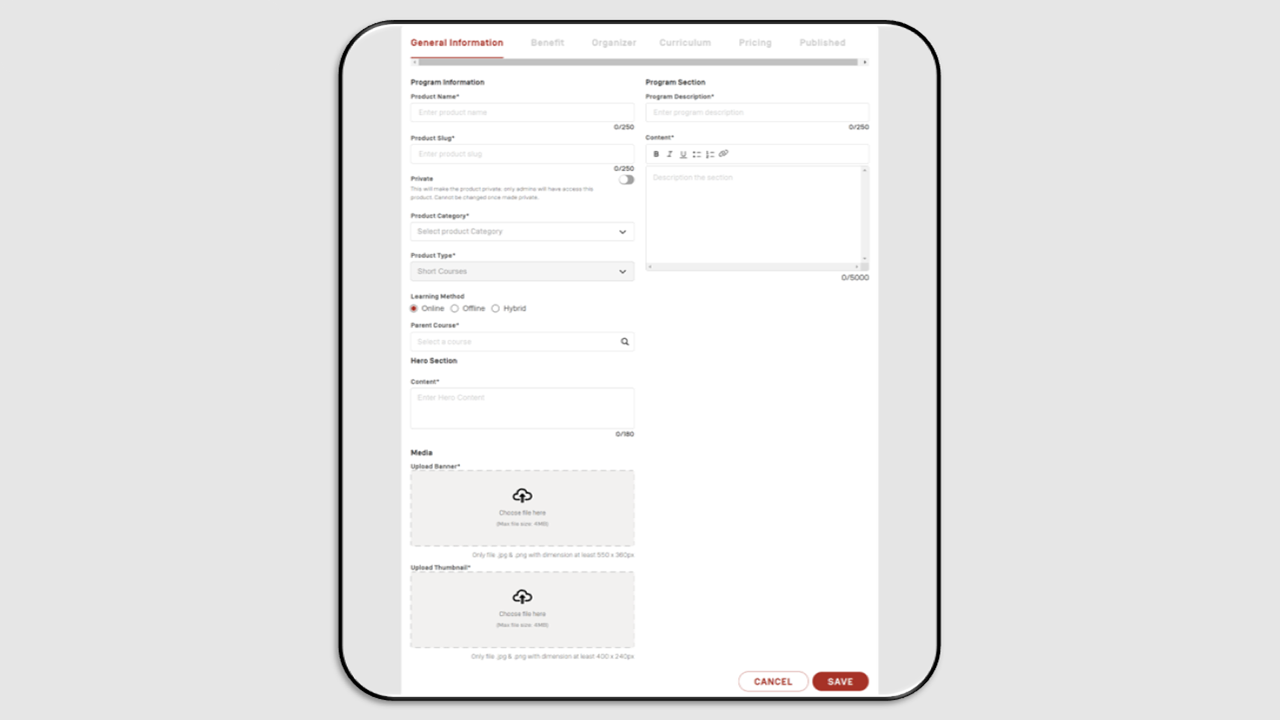
- Product Name : Enter the course title.
- Product Slug : This field will be automatically filled after the admin enters the product name.
- Product Category : Select the appropriate product category for the course.
- Product Type : This field will be automatically filled based on the selected course type during the initial creation (Short/Bootcamp/Master).
- Learning Method : Select the learning method (Online/Offline/Hybrid).
- Parent Course : Select the first course created that contains the training title.
Hero Section
Content : Contains an invitation to join the course.
Media
Upload Banner & Thumbnail : Upload a banner and thumbnail for the training. Ensure that the banner and thumbnail sizes meet the requirements.
Program Section
- Program Description : Enter the course title.
- Content : Contains an invitation to join the course.
If all sections are correctly and properly filled, click Save.
2. How to Fill in the Benefit Section
Click menu edit.
You can fill in the following data:
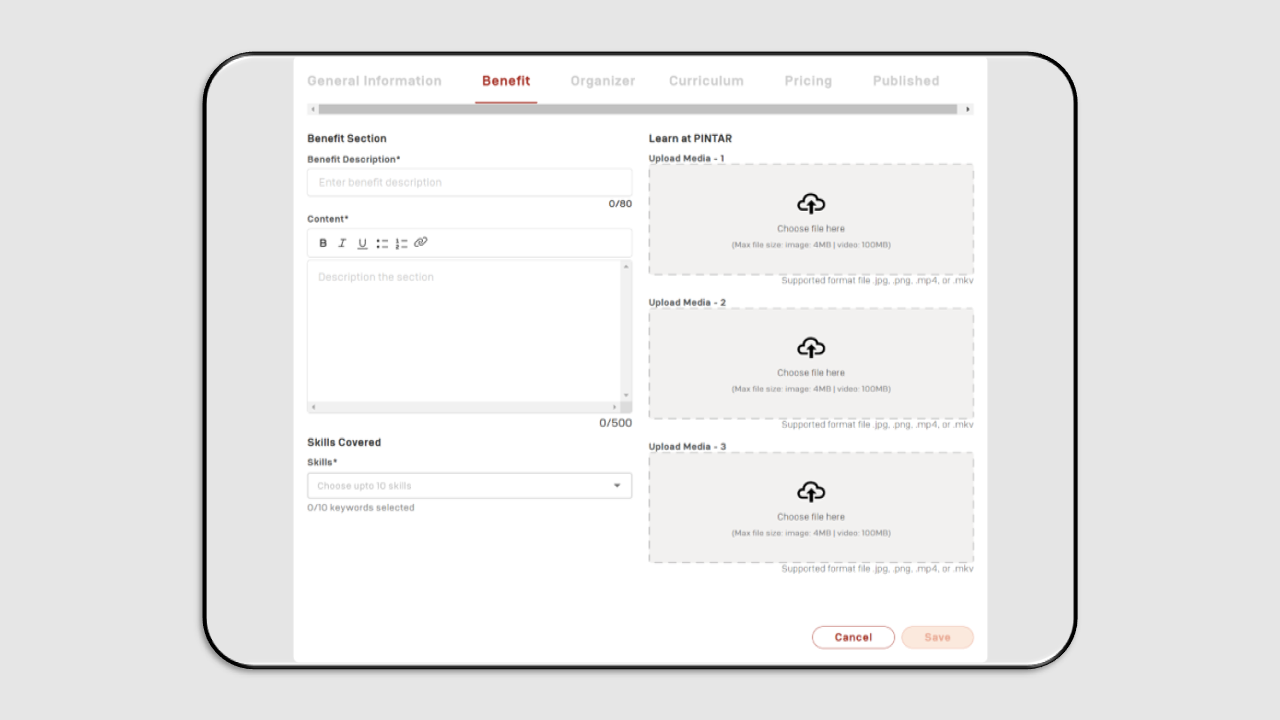
Benefit Section
- Benefit Description : Enter the training title.
- Content : Describe the benefits participants will receive from the course. (Example: course duration, certification, and more).
- Skills Covered : Select skills related to the course title and materials.
If the entered data is correct and complete, click Save.
3. How to Fill in the Organizer Section
Click Edit in the upper right corner.
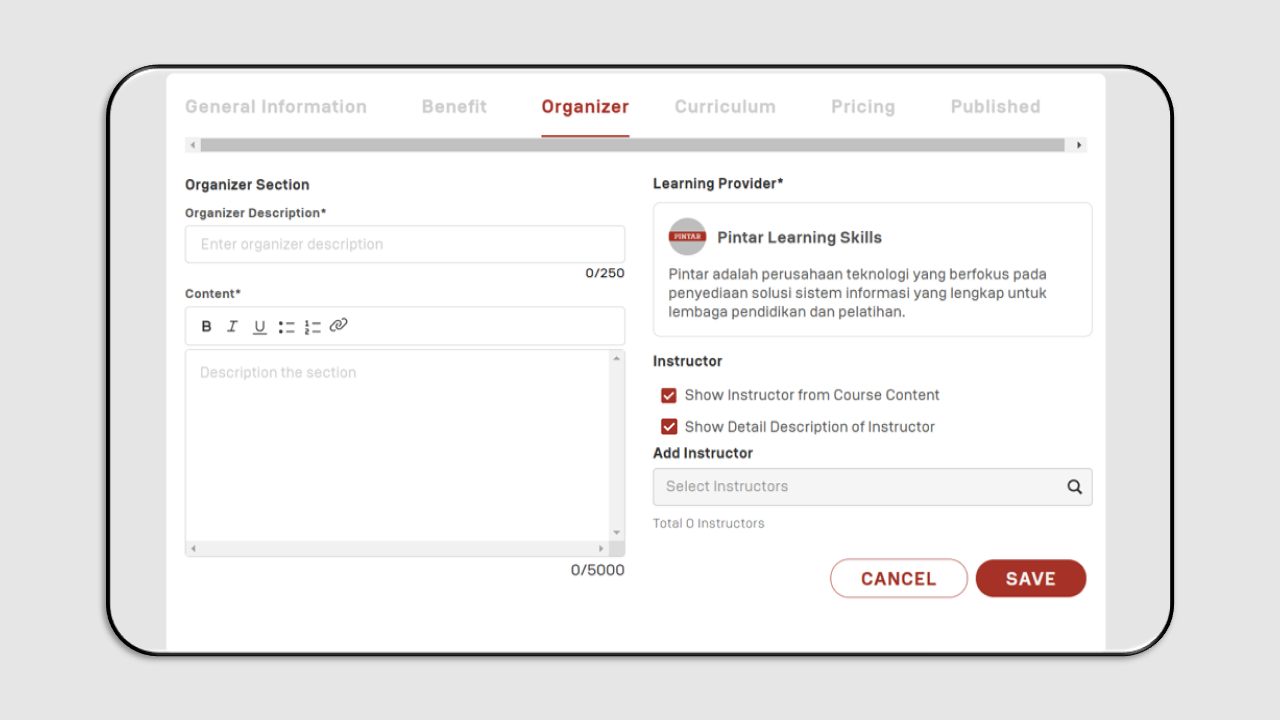
Organizer Section
- Organizer Description : Fill in according to the training title.
- Content : Contains a call-to-action sentence for the course being created.
- Learning Provider : Will be automatically filled based on the course selected during the General Information entry.
- Instructor : Check both items.
- Add Instructor : You can select an instructor for the course.
If the entered data is correct, click Save.
4. How to Fill in the Curriculum Section
Click Edit in the upper right corner.
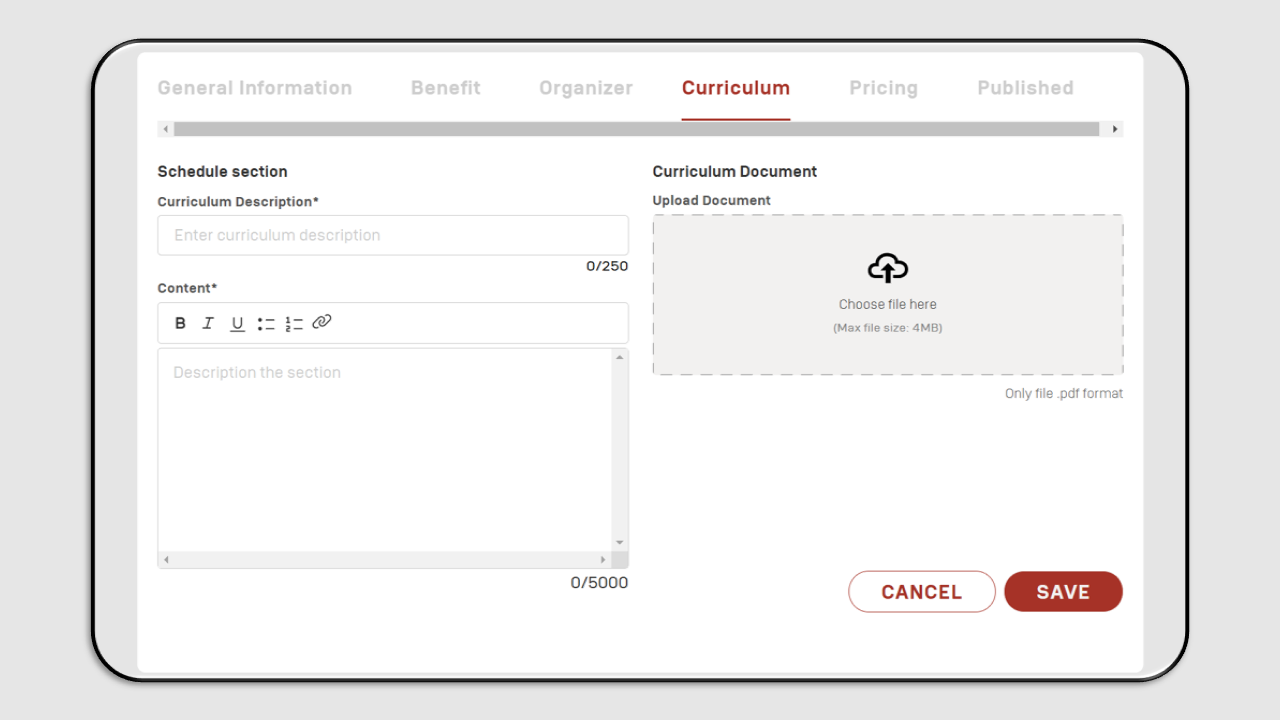
Schedule Section
- Curriculum Description : Fill in according to the training title.
- Content : Contains a call-to-action sentence for the course being created.
If the entered data is correct, click Save.
5. How to Fill in the Pricing SectionClick Edit in the upper right corner.
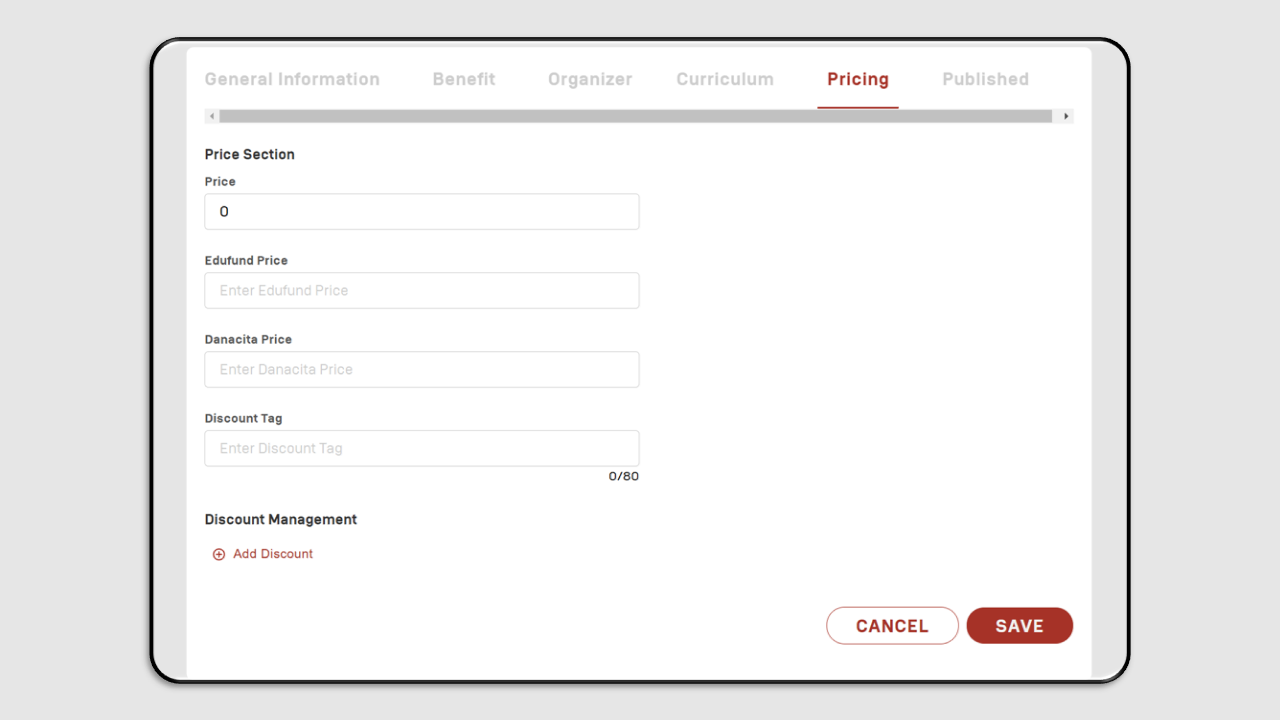
Pricing section
- Price : Fill the appropriate price for the training.
- Edufund Price : It is a payment method in the form of a temporary loan. This is what differentiates the payment amount.
- Danacita Price : It is a payment method in the form of a temporary loan. This is what differentiates the payment amount.
- Discount Tag : It contains a discount for the class.
Discount Management
Click Add Discount to add a discount.
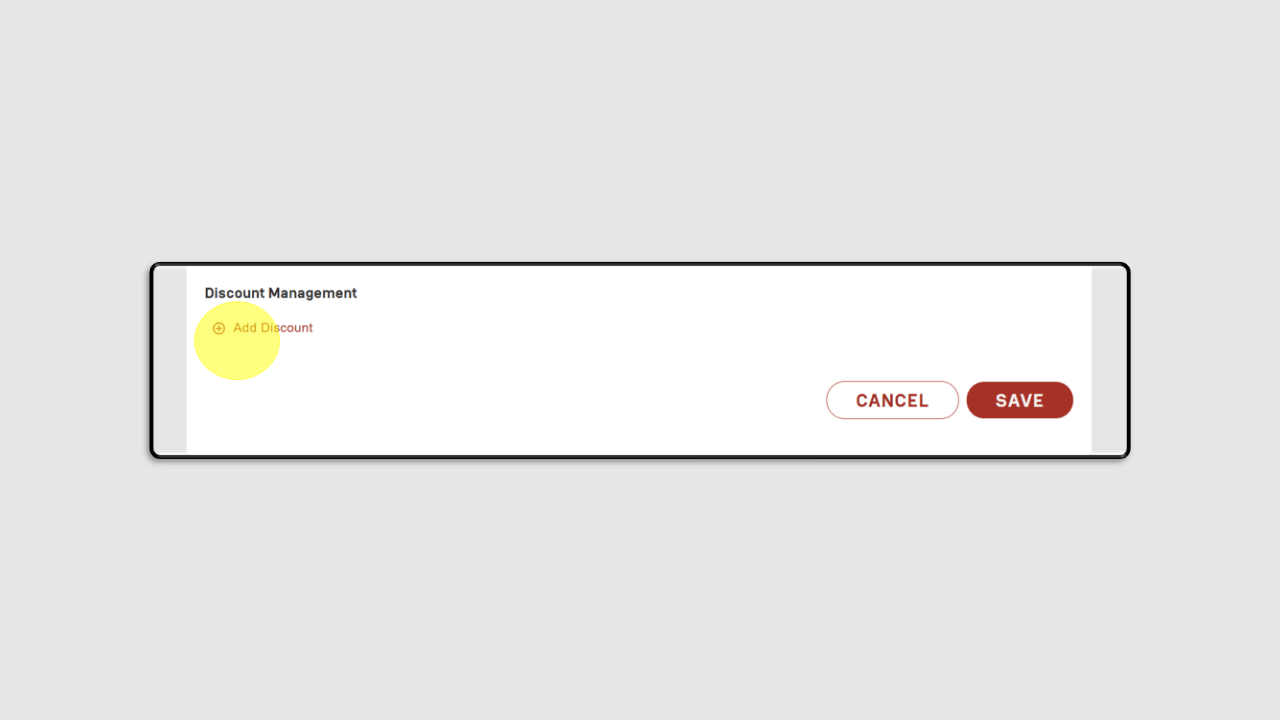
Enter the discount name, discount date range, discount type (percentage or fixed), nominal value (percentage or fixed), and the Final Price will be automatically filled.
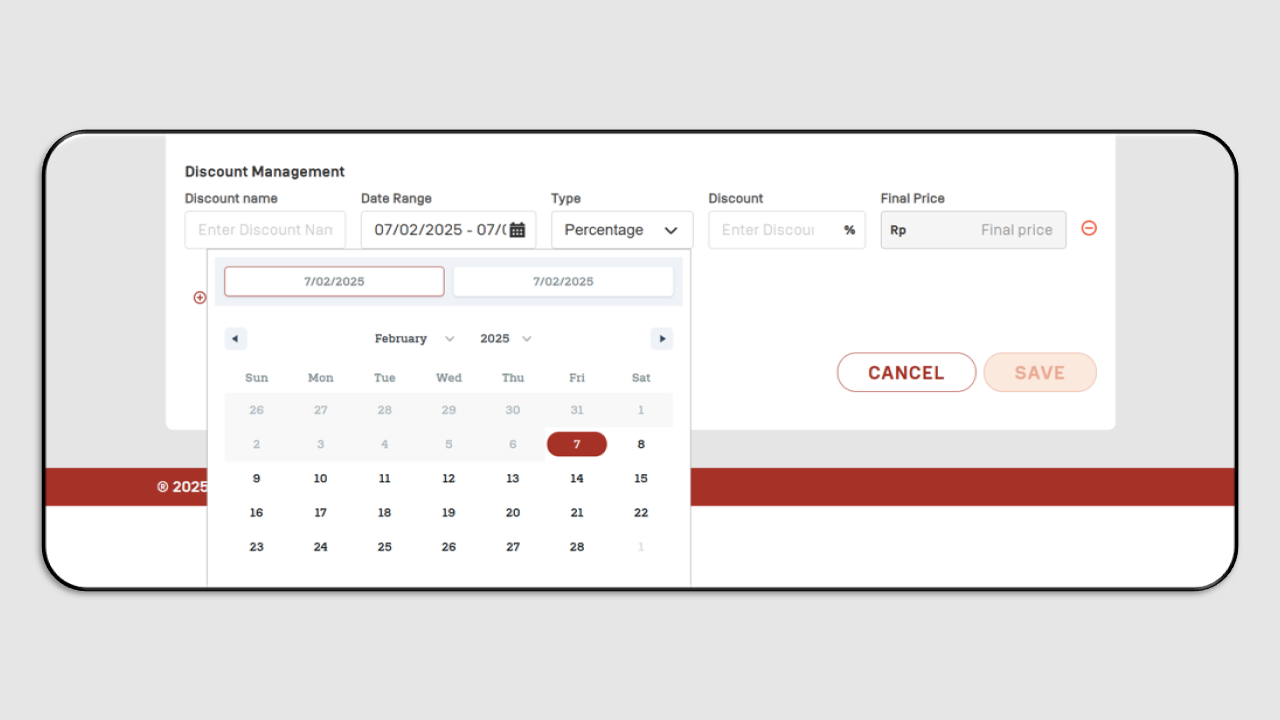
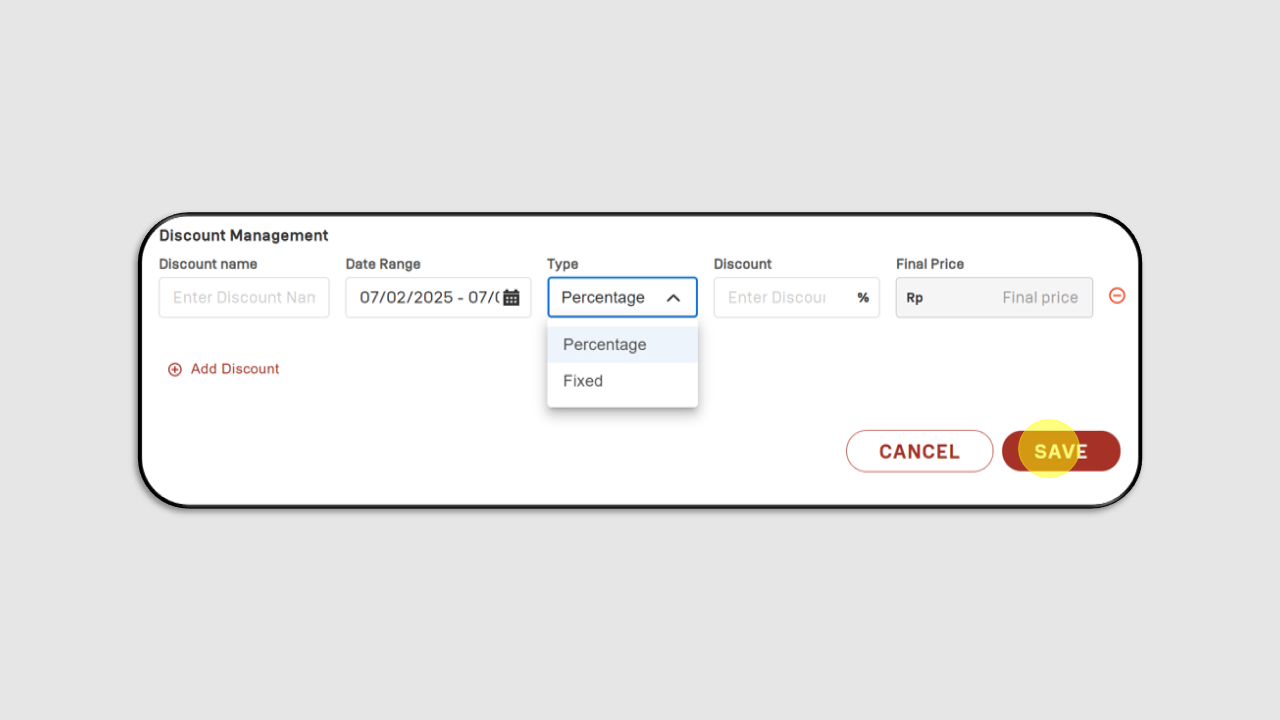
If the entered data is correct, click Save.
6. How to Publish the Product Page
After all the data has been correctly filled in, click Publish.
a. If the status is Draft, the product has not been published yet.
b. To publish the created product, click Publish.
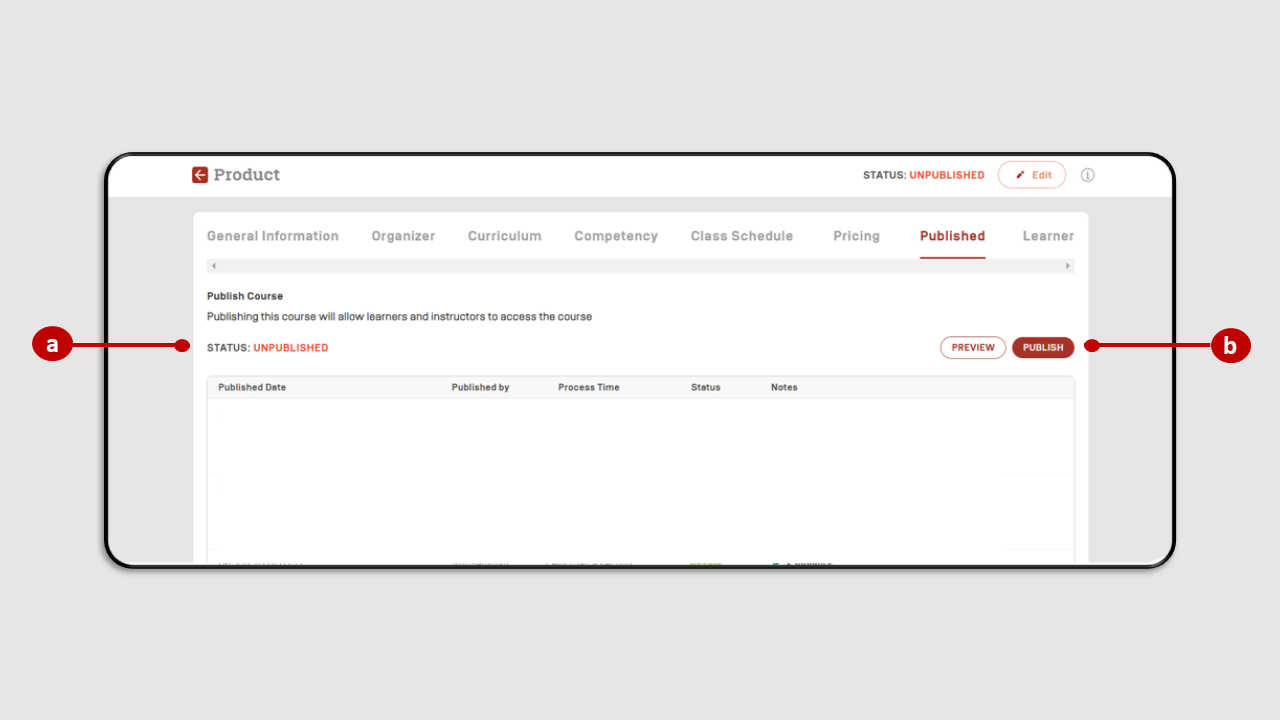
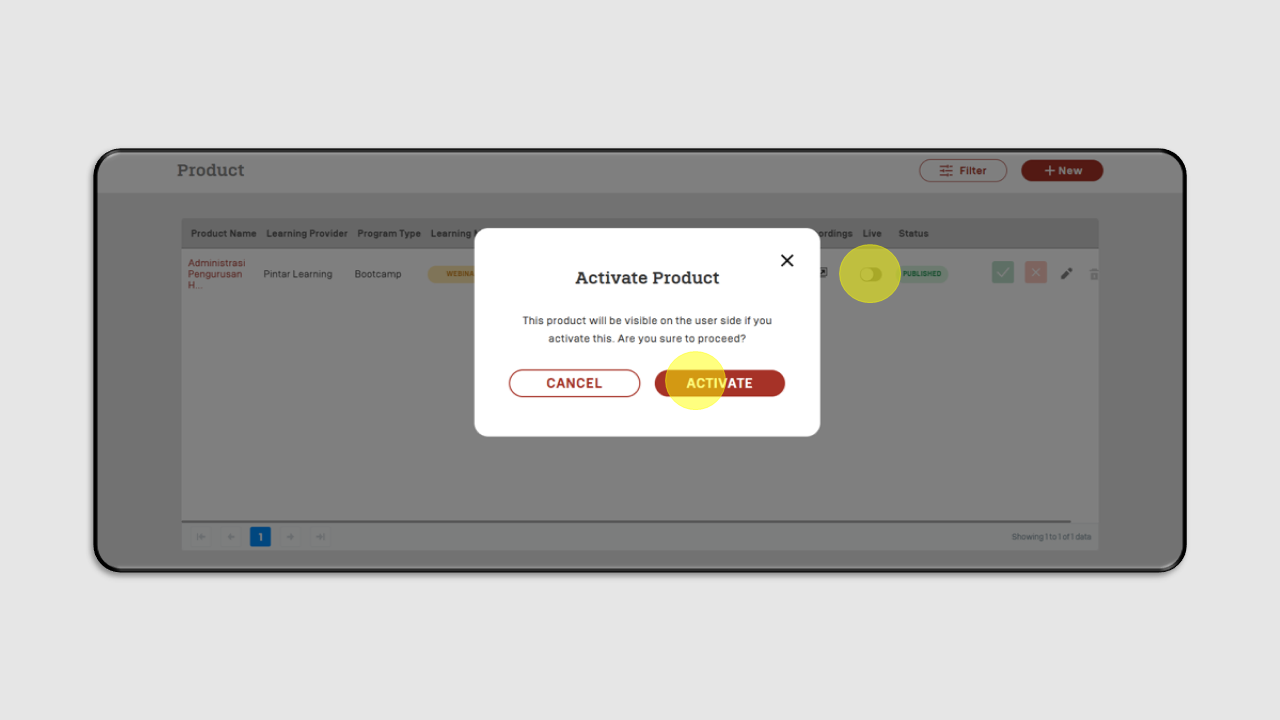
After publishing, activate the product page by enabling Live, then click Activate.
